

The Secret to Having Great Getting Ready Photos
(What you can do, and why your Airbnb really matters)

sam@samstarns.com @samstarns
Getting ready photos are some of the first images you’ll see when you open your elopement gallery.
They’re what you and others will likely see first in your album.
They’re what set the stage; what starts telling the story of your day before you ever put on your wedding clothes, have your first look, or head out onto your adventure.
And while you might be thinking that getting ready photos are just a few photos of putting on your dress, buttoning up your shirt, or tying your shoes, there’s actually a lot more that goes into making them great.
One of the biggest factors? Where you choose to get ready.
I’ve photographed elopements in all kinds of lodging, from cozy cabins to beautiful modern Airbnbs, and know this: not all getting ready locations are created equal. Some make it incredibly easy to create beautiful photos, while others make it a lot more challenging. You’re just not going to get the same images you’ve seen in sample galleries if your lodgings aren’t set up for those images.
Good news: there are a few pretty simple things you can do to set yourself (and your photographer) up for success.
1. Choose an Airbnb or lodging with GOOD natural light
This is probably the single biggest thing I want couples to consider when choosing where to stay for their elopement.
Natural light makes a HUGE difference in getting ready photos.
When you’re browsing Airbnb listings, look for spaces with big windows, lots of daylight, and lighter-colored interiors. That doesn’t mean you need to book an entirely white, minimalist Airbnb. But you do want somewhere that isn’t dark, especially if you’re planning on having your getting ready photos taken inside.
A cozy log cabin can look insanely adorable in the listing. But if it’s got small windows (or just a cramped space), dark wood walls, dark furniture, and yellow-toned lighting, it’s probably going to be pretty dark inside.
And that makes getting ready photos a lot harder if you’re hiring a natural light photographer (i.e. they don’t use flash much, if it all).
Same goes for cabins with that faux wood paneling from the 70s, or even some really cool mid-century modern spaces. They can absolutely work, but they need a SHIT TON of natural light to compensate for all those darker and warmer surfaces.
Otherwise, you’re dealing with a space where everything looks orange or yellow, and there’s not enough natural light to balance it out.
What makes a BAD getting ready Airbnb?
Because sometimes a listing can look really cute online but be a terrible choice for getting ready photos. Here are a few examples:


There’s nothing *wrong* with this Airbnb, necessarily. But from a photography standpoint, there’s nothing special about the exterior (and what you * don’t* see is a mining/construction site behind the exterior photo). The interior also doesn’t have much natural lighting. The photo was taken on a bright, sunny day. When it’s cloudy, the living room is much gloomier.


A cute enough exterior for Alaska (where this listing is), but the interior is *dark*. That said, it’s better than the following Airbnb. I present to you, the stuff of wedding/elopement photographer nightmares:


Would you believe me if I told you these were some of the *better* photos in this listing?
Here are a few more images that indicate the listing isn’t ideal, whether it looks like a small space, not a lot of lighting, or weird color casts (faux wood paneling, I’m looking at you). Keep in mind that listing photos often make the place look a little better than what you see in real life. The photos have ideal lighting, or a lot of editing.


What makes a GOOD getting ready Airbnb?
TO BE CLEAR: it doesn’t have to check EVERY one of those boxes. A darker cabin with enormous windows might work great. Or maybe the interior isn’t ideal, but there’s a gorgeous outdoor space where we can photograph some of those moments instead.
Here are some examples of great lodgings that have enough light, neutrality and interest to give you room (physically and figuratively) for great getting ready photos…


You don’t have to spend $500 a night on an Airbnb
I know what some of you are probably thinking: a lot of these beautiful, bright, modern Airbnbs aren’t exactly cheap.
I get it. Not everyone has $500+ a night to spend on lodging, especially when you’re already paying for travel, photography, and everything else that goes into your elopement.
But there ARE more affordable places out there that still have great natural light and provide a beautiful space to get ready.
You don’t need a luxury Airbnb with floor-to-ceiling windows and a mountain view. Sometimes a relatively simple space with good windows, lighter walls, and enough room to move around is going to photograph better than an expensive log cabin with dark wood everywhere.
And sometimes? Spending a little more on your lodging IS worth it. Especially if it’s somewhere you’re really excited to stay, somewhere that’s part of your overall elopement experience, and somewhere that’s going to give you a beautiful place to start your day.
But what if you’re camping or getting ready in a van?
Okay, so here’s where I’m going to throw some of those rules out the window.
Because if you’re planning to camp the night before your elopement, get ready in a tent, or spend the night in your camper van, that’s a TOTALLY different experience.
And honestly? That’s badass.
We’re not trying to make a tent look like a beautiful, light-filled Airbnb. We’re photographing the experience of getting ready for your wedding day in the middle of an adventure.
It’s going to be a little more rugged. Maybe you’re sitting on the edge of your van pulling on your boots, or you’re getting dressed next to your tent with the mountains behind you.
That’s part of the story, and I want to photograph it that way.
Plus, from a practical photography standpoint, we’re probably going to be using the outdoors anyway.
There usually isn’t enough room for you AND me to be inside a tent or camper van while you’re getting dressed. Even if you’re getting ready inside your van, we’ll probably need to have the doors open so I can actually photograph what’s happening.
Which means we’re naturally going to have a lot more daylight to work with.
So if you’re planning on camping, getting ready in your trailer, or going van-life for your elopement, don’t worry about following all the same lodging rules.
The goal is to photograph YOUR experience, whether that’s in a beautiful Airbnb or outside your tent in the middle of nowhere.


Bonus: Your hair and makeup artist will thank you, too.
Spoiler alert: good natural light is also really helpful for your hair and makeup artist.
A lot of professional makeup artists bring their own lighting, but having good natural light is still incredibly helpful. If you’re getting your makeup done in a dark room with a bunch of yellow lighting, it can be harder to tell how that makeup is actually going to look when you step outside into daylight.
And if you’re eloping outdoors, that’s kind of important.
So choosing a space with great natural light doesn’t just help your photographer. It can help your hair and makeup artist, too.
2. Keep your getting ready space CLEAN
(so I don’t have to add “housecleaner” to my list of job duties)
I tell every single one of my couples this.
Please, PLEASE clean up your Airbnb before I arrive.
I’m not saying you need to make it look like nobody is staying there; you’re getting ready for your wedding day. Of course you’re going to have stuff!
But there is a difference between a space that looks lived in and a space where there are clothes thrown over every chair, suitcases open on the floor, food wrappers on the counters, and random stuff everywhere.
All that clutter makes it harder to find clean backgrounds for your photographs.
It also means that either you’re going to spend time cleaning up when I arrive, or I’m going to be moving things out of the way to get photographs, eating into the time I could be capturing moments. And neither of those is a particularly great use of your elopement photography coverage.
So, before your photographer arrives:
You don’t have to make it perfect. Just make it so we’re not spending a bunch of time moving things around before we can even start taking photographs.


3. Don’t share your getting ready Airbnb with your family and friends
Have your family and friends stay somewhere else. Especially if your lodgings is a tiny home, or is less than 1,500 sq ft.
There are a couple of reasons for this.
First, more people means more stuff. More suitcases, more clothes, more toiletries, more things left on counters and furniture. And the more people you have staying in one place, the harder it is to keep everything clean and organized.
But the bigger issue is distractions.
When you’ve got a bunch of people sharing your getting ready space, they’re going to be asking questions.
They’ll need to use the bathroom.
They’ll be getting themselves ready.
They’ll be looking for things.
They’ll be asking where they should be.
They’ll be potentially interrupting whatever you’re doing.
They’re often also asking me tons of questions and keeping me from doing the job you’re hiring me for.
And all of that takes time.
If you stay with your family/guests or have them present during getting ready (tbh, especially if they’re older), I add on at least an extra 30 minutes of getting ready coverage. Sometimes it’s an hour.
Instead of having a relatively relaxed morning where you and your partner can get ready, you’re now sharing that space with everyone else’s schedules and needs.
Want to know what I hear the most after taking my couples away for a first look after getting ready?
“Whew. I love my family/friends, but they’re a lot. I’m glad we’re done getting ready and I can have a break.“
Having your own lodging gives you a lot more control over your getting ready experience, and it gives us a better opportunity to photograph those moments without constantly working around other people.
4. Bring a few meaningful details for your getting ready photos
You do NOT need to spend hundreds of dollars on fancy wedding details to have beautiful detail photos.
Seriously.
Some of my favorite detail photos have been incredibly simple. A couple of vow books, the rings, maybe a necklace or a pair of shoes.
That’s it.
But if you want to add a little something extra, one of my favorite things to incorporate is something that represents the place you’re getting married.
Maybe that’s a postcard from the national park you’re eloping in. A couple of stickers from the area. A guidebook. Or even a photography coffee table book featuring the landscapes around you.
These things can make your getting ready photos feel a little more connected to your actual elopement experience, rather than just being photographs of wedding accessories.
For example, I’ve photographed details for an elopement near Glacier National Park where the couple had just a few simple items. But because their lodging had some beautiful Glacier National Park and Montana imagery available, I was able to incorporate those into the photographs.
And suddenly those simple detail photos had a little more connection to WHERE they were getting married.


Want to include a little more?
If you’re someone who loves detail photos and wants to bring a few extra things, here are some ideas:
And again, you don’t need ALL of these things.
If all you have are your vow books, rings, and shoes, that’s completely fine. But having one or two additional meaningful items can give us a little more to work with.
“I had NO idea the wood stained like that!”
A quick note about flowers (and why I recommend real ones)
If you’re having flowers at your elopement, I really recommend using real florals.
Fake flowers, especially silk flowers, generally don’t photograph particularly well. Some wood flowers can look okay, but there’s something else to be aware of with those: they can stain your clothes.
I’ve actually had wood flowers stain wedding dresses before.
And then I’m crouched down on the ground with a Tide pen, trying to get a stain out of a wedding dress, while we’re burning 15 minutes of photography coverage doing something that could have been avoided.
Not exactly how anyone wants to spend part of their elopement day.
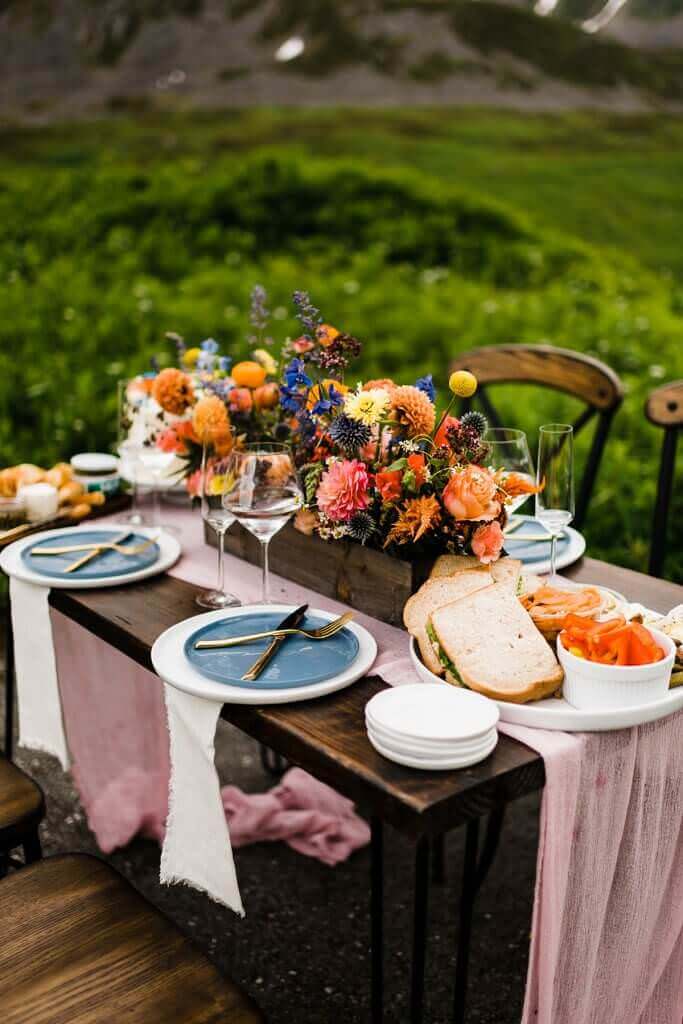
If you’re working with a floral designer, another little thing you can ask for is a couple of extra sprigs of greenery. Maybe some ferns, leaves, or whatever foliage they’re already using in your bouquet.
It doesn’t have to be anything elaborate or expensive. Just a couple of extra pieces that I can incorporate into your detail photos.
Sometimes I can find appropriate foliage outside to use, but that’s not always possible, so having a few extras from your florist is a great option.


5. Why all of this matters for your elopement photos
At the end of the day, getting ready photos aren’t just about photographing your wedding clothes and accessories. They’re setting the stage for the story and adventure you’re about to have.
When you open your gallery, these are likely going to be some of the first photographs you see. They’re what establish the setting, the atmosphere, and the feeling of the day before the rest of your adventure unfolds.
When you’ve chosen a beautiful, well-lit place to get ready, kept the space relatively clean, and brought along a few things that are meaningful to you, it gives us so much more to work with.
That doesn’t mean you need to rent the fanciest Airbnb in the area, buy a bunch of expensive details, or make your getting ready space look like something out of a magazine. BUT it does mean being a little intentional about the space you’re choosing and the things you’re bringing.
A few solid decisions before your elopement can make a pretty big difference in how those first moments of your day are photographed.
Get in touch to get custom lodging recommendations for where you’re eloping, or grab my free elopement checklist to start feeling extra-prepared and extra-elated.
OTHER BLOG POSTS YOU MIGHT BE INTERESTED IN…
Ready to Rock? Let’s connect.
Not just connect with each other, but your elopement destination. Feel more present on your day with a former park ranger and locations expert at your side.
xx,
Ranger Sam


Searching for more Top elopement resources?


